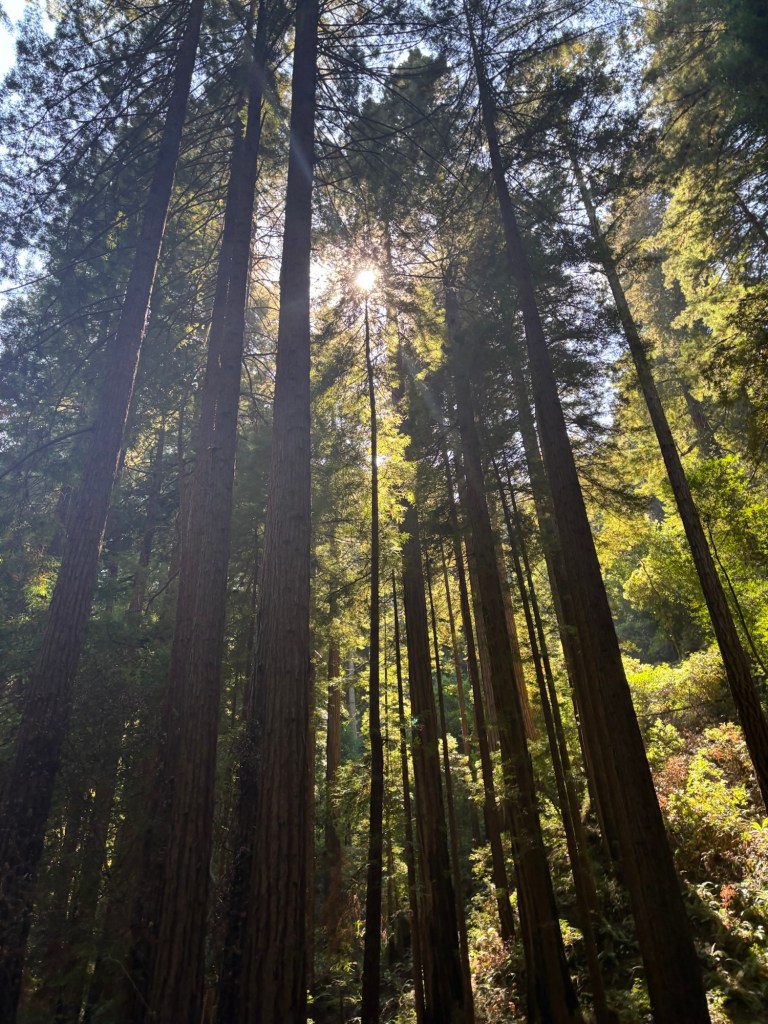
In J.R.R. Tolkien’s The Lord of the Rings, and in Peter Jackson’s cinematic interpretation of these works, the trees are alive and herded by the Ents. This mythical enchanted forest was a source of great fascination to me as a child, though I have never found real forests to emulate quite the same feeling in me. That is, until I saw a grove of Redwood trees looking down on me. On this vacation, I embodied the spirit of the Hobbit, less than 4 feet tall and in the warm embrace of something so old and precious that it was rooted deep into the soil around me.
I am fortunate enough to have family in the San Francisco Bay Area, and so my boyfriend and I took the opportunity of visiting them, and incorporated a little adventure along the way. In this post I will focus less on the things to see and the culture to experience, and more on hiking trails you should check out and views you don’t want to miss. For our part, we flew into the area using the San Francisco and San Jose airports, which are less than an hour apart by car or Uber, allowing for lots of opportunities to find cheaper flights. We made it a week long trip, arriving the Saturday before Labor Day, and departing the Sunday after. With the Labor Day holiday, the ability to work from home while visiting family, and 1 day of PTO, we were able to go on 3 little mini-adventures along the way.
Part 1: Mission Peak – Shrubs, Salt, and San Francisco Views
Despite spending a substantial amount of time in the area, I had actually never before visited Mission Peak in Fremont CA. The peak itself is nothing too impressive – the path is clear and not very technical, the incline is manageable with some steep portions at the very top, and it has the cultural feel of a community park more than a mountain. More hill than “peak” I would say, but a hill with a clear purpose. Locals use this as a training ground for their races, hikes, and all sorts of adventure. We decided to see what the hype was about and join in the fun.
While I wouldn’t recommend going here if you’re touristing in the area – after all, there are plenty more hikes and views to be had – if you’re spending a while there then it’s worth a visit for some fresh air and exercise. In the winter months, the path is covered in picturesque fog, and for the short weeks of spring it is graced by wildflowers. A grazing grounds for cows in the area, make sure you keep an eye on where you step! For us, this served as a nice warm up hike to the adventures to come and provided a view into what it might be like to live near the hiking. To get to good hiking in Boston, you have to drive – and I mean, really drive. So the thought of a nice training ground in one’s backyard is certainly tempting.
The highlight of this experience was that as you approach the top of the peak, you get views that stretch farther than you expect. We were able to spot the Bay Bridge in the distance, and were told that the Golden Gate Bridge is also visible on clearer days. Moreover, I had no idea that California had salt flats – and right near San Francisco! We saw the white stretch of salt much closer to us than we anticipated. All in all, this was an experience that I enjoyed, though not one I would recommend going out of your way for. If you live near this area though, hit up Mission Peak as a good spot to train for your next big hike!
Part 2: Yosemite – Big Rocks, Big Waterfalls, Big Trees
Ok so here’s the real meat of the adventure portion of our trip. We spent one night in Coulterville CA, a town that is about an hour outside of Yosemite National Park, and provides affordable AirBnBs for those visiting the park. On Monday we drove the 4-5 hours from the Bay Area to Yosemite National Park, and on Tuesday we drove home. While this was a short visit, and the extent of our activities was time limited, we still managed to cover 3 regions of the park and have what felt like a fairly thorough visit.
Getting There & Getting Around:
We opted to drive, and that is certainly the best way to do the journey. However, if you’d prefer not to drive there is apparently public transit access to the park through Amtrak and a system called YARTS. We didn’t use this system, and can’t provide too much information around it, but I love to see public transit in places that I don’t expect it. Especially in one of our treasured national parks, hopefully providing access to many people who would otherwise be unable to get there! Once you’re in the Yosemite Valley area, there is a shuttle service that will take you around. It is suggested that you park your car at your first stop (we chose Curry Village) and then use the shuttle service to get around during the day.
It’s critical to visit the website for a national park before your visit, as this is where you’ll find the most up-to-date information about road and trail closures, weather conditions, and any specific entry requirements. In the summer, to control crowds, Yosemite requires that you make a reservation online before visiting the park. The reservation is free, with a $2 online processing fee, and the usual National Park entry fee is still due at the entrance of the park, but this means fewer lines and easier access for more people. We easily got reservations for the day we were going, and after paying the per-car entry fee we gained access for 3 days, though we only used 2. It’s likely that reservations are harder to come by on weekends or during peak season, so make sure you plan ahead for this. Additionally, the entry fee cannot be paid by cash and many of the stores and restaurants in the park do not accept cash either, so make sure you have a contactless payment method available to you.
Yosemite Valley:
Oh the views we viewed! We spent our entire first day in the Yosemite Valley area of the park and enjoyed many miles of walking, a little hiking, and spectacular sights. Start your day with a walk around the Lower Yosemite Falls Trail. This trail has an accessible route available for wheelchair users, and the non-accessible route is also very family friendly as it only features a small portion with greater than 15% incline. This takes you to the bottom of Yosemite Falls and provides a nice view. You can extend the walk by adding in Cook’s Meadow Loop which is just across the street from the Lower Yosemite Falls Trailhead and features some informative signposts about the formation of the valley and some of the adverse weather events that still affect life in the valley.

We started our day pretty late, given the long drive to the park, so after these two trails we headed straight to our lunch reservation at The Ahwahnee. This is a beautiful lodge nestled in Yosemite Valley. If you can afford it, and you book early enough, it’s probably a great place to stay as you visit the park as well. For us, we enjoyed walked around the public spaces of the lodge and eating in their gorgeous dining room with high ceilings. The food was surprisingly reasonable in pricing and excellent in preparation. If you’re short on energy, you can take the shuttle service from Cook’s Meadow over to The Ahwahnee. In our case, we had plenty of energy and limited time and found that walking was actually faster.
After lunch we once again took the walking strategy and made our way to the Vernal Falls Trailhead. We committed ourselves to making it, at a minimum, to the Vernal Falls Footbridge. This spot cuts the hike to the top of Vernal Falls in half, and before you reach it you will experience some of the challenging inclines that will continue up to the top of Vernal Falls. While my boyfriend had the energy to keep going, I was somewhat tapped out by this point and could not continue to the top of the falls. However, the falls are beautiful and if you have the physical capacity to do it, I would recommend completing this hike! For myself, I intend to come back and conquer it on a day when I’m holding a permit for climbing Half Dome, the trailhead for which is at the top of Vernal Falls.
If you need a little more exercise at this point in your day, you can drive back to Tunnel View where you get picturesque postcard views of the highlights of Yosemite Valley. From here, you can access the trail up to Inspiration Point where artists allegedly captured some of the first paintings of El Capitan and Half Dome. Due to natural changes in the geography of the valley, the view is now an obstructed one, but still makes for an interesting hike.
Glacier Point:
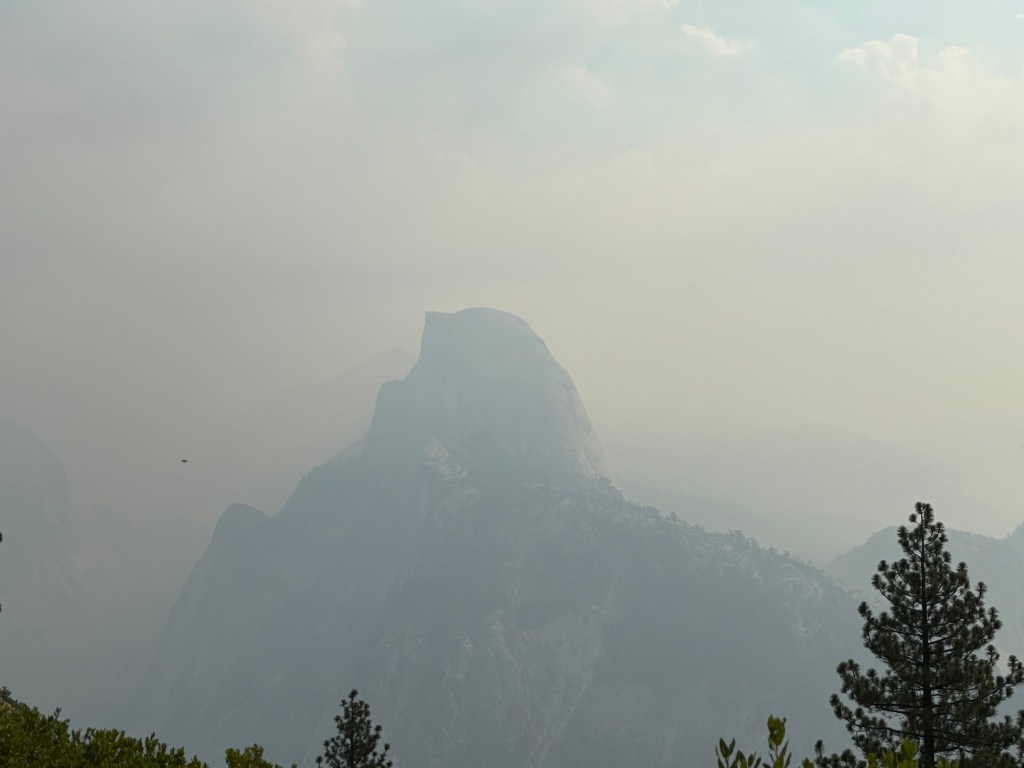
The Glacier Point area of the park is nearly 2 hours drive away from the main Yosemite Valley area and is not serviced by shuttles. Moreover, the single road that accesses Glacier Point and other sites in this section is closed throughout the winter, so check the National Park Service website before your trip to make sure you’re in the right season for this area. We started by driving out to Glacier Point itself, where you can take a leisurely stroll to an iconic viewpoint. Be aware that even in the summertime, the view can be affected by weather conditions. In our case, it was a smoky day with a high fire risk which made the view less clear.
We drove a little ways back down the road to Glacier Point and parked at a trailhead. Here we did a loop hike where we first climbed Sentinel Dome (a far easier climb than Half Dome, but one that still affords 360 degree views of the Yosemite Valley) then made our way back via Taft Point. There are multiple views along this hike and it is a generally scenic experience with the classic extra tall trees all around you.
Mariposa Grove:
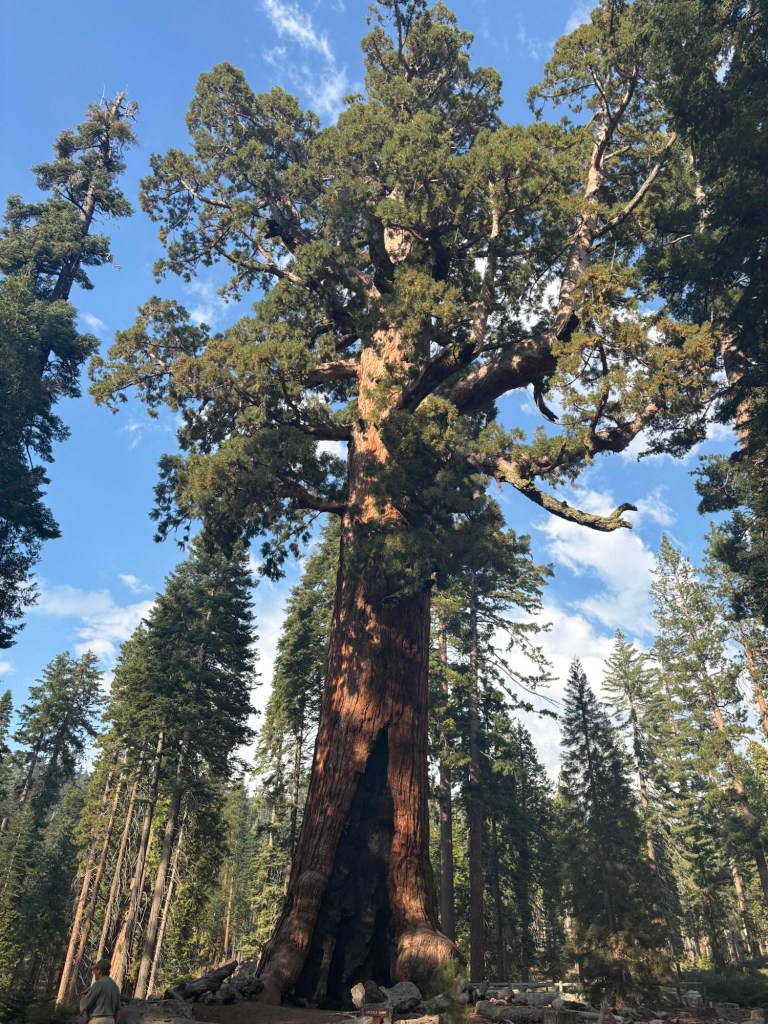
This is the real Lord of the Rings moment, when you feel like any one of the trees around you could suddenly shift, pick you up, and take you on a little walk through the woods like an Ent. There is clear signage in this area that takes you to a parking lot, from which you can take a shuttle up to the Mariposa Grove. For those who are more ambitious, it is possible to hike up to the Grove from the parking lot. Once you are at the Grove, there are multiple well marked loop trails of varying distance to try out. We went with the Grizzly Giant Loop which features several iconic Redwood trees including the Grizzly Giant.
Part 3: Muir Woods – Water, Wind, and Woods
The third adventure we went on during this trip (a good 5 days after Yosemite, to give our legs time to rest) was to the Muir Woods. This is a convenient day trip from any part of the San Francisco Bay area and is just north of the city of San Francisco. Be sure to reserve parking ahead of time! The parking lots here fill up fast and without an advanced reservation you will not be able to visit the park. For the casual visitor, there is an entrance fee from the main visitor center to explore the Redwood grove.
If you’re willing to hike though, you don’t need to pay a fee to enter the Muir Woods forest. We followed the Dipsea Trail from the Muir Woods parking lot all the way to Stanley Beach. On the return, we found a fork off point where we hopped onto the Ben Johnson Trail. This trail eventually becomes the Hillside Trail and leads right into the heart of the Muir Woods. I loved the changes in terrain on this hike. There is some flat terrain with a good amount of wind exposure, the opportunity to look at and eventually walk all the way out to the Pacific Ocean, and trees that loom over you in a way that makes you feel absolutely enchanted.
On the whole, we really managed to maximize this trip to California. The biggest realization was that we really haven’t done most of what is out there! The Tahoe area is also accessible for a weekend away, or perhaps a ski trip, and if you’re willing to drive further then Redwoods National Park is about 6 hours from the South Bay! We will certainly be back to hit some more of these wonderful slices of nature (and maybe back again to hit up Napa Valley for some wine).
